Showing posts with label Small Space. Show all posts

Thursday, July 26, 2012

Little Collections

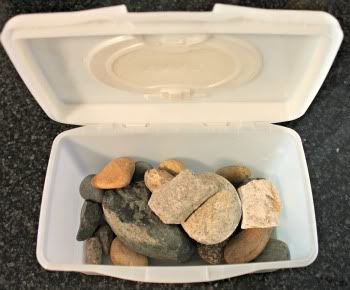
My three-year-old daughter loves to collect rocks.  She is always finding them and bringing them home.  We were storing them in a recycled wipe box on our front porch.  The problem was she really couldn't see or play with them.  They box was getting yucky, too.  Sitting outside it picked up a lot of dirt.


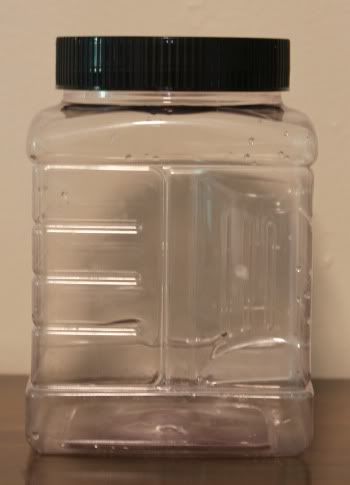
I saw this idea (I cannot remember where - so sorry!) for putting collections into old jars. I had an old plastic container leftover from Parmesan cheese we had bought at Costco.  It was the perfect size to store her collection.  I washed it inside and out and removed the label.  I had to use a little rubbing alcohol to remove the sticky residue from the label.


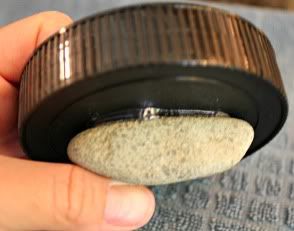
Then I hot glued one of the rocks on top of the lid.  This would act as a little decorative handle.


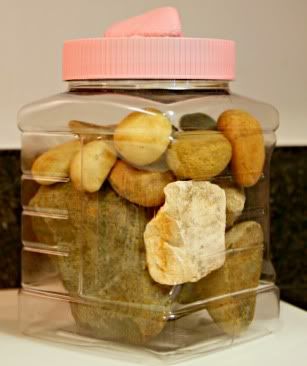
I spray painted the lid pink (my daughter's favorite color) and loaded the container up with her rocks.


It turned out so cute.  There is still room to add more rocks and I love that she can see her little collection.  We ended up putting the rock jar in her room on her dresser.  She just loves it!

How do you store little collections that your kids bring home?


PS  I'm linking up over at Delightful Order and Organize and Decorate Everything!

Tuesday, July 24, 2012

Weekly Goal Setting - Finding Balance

I told my husband last week that there are not enough hours in the day to accomplish everything that I wanted and needed to do.  He laughed and reassured me there is enough time - I just need to look at how I am prioritizing things.  If you want to do something in particular, than you need to put it at the top of your to do list.  It was a brief conversation, but it really got me thinking.  I already make a list of things I plan on doing over the course of the week.  What if I took it a step further and really thought about what I needed to do to gain a sense of accomplishment and set those things as top priorities?

I came up with a worksheet I intend to fill out each week (most likely on Sunday night when we are gearing up for the new work week).  The worksheet helps me prioritize what I want to accomplish over the course of the week.  I've included a skeleton of it here if you would like to use it too!


Basically, I plan on doing the following:

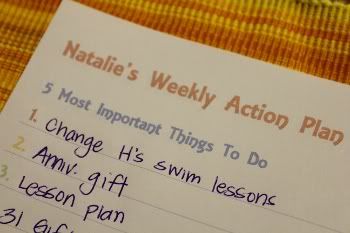
  1. Identifying the 5 most important things I must do that week (they don't have to be big).
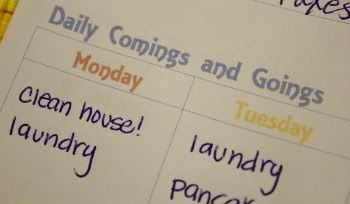
  2. Briefly listing daily plans.  This will include places I'm going and specific chores I want to accomplish.
  3. Setting specific goals for business/hobbies. (I've got a lot of these...running a small business, blogging, taking care of my two kiddos, and teaching elementary school part time!)


The plan is to make more time in my day to spend quality time with my kids and to take some me time.  Plus, I'm one of those annoying amazing list people - If I write it down it most likely get's done.  And if I set it as a priority than it really will get done.  Right?  Wish me luck with this.  I'll post an update in a few weeks to let you know how it's going!

In the meantime, what do you do to organize your time?  How do you accomplish everything you want to in a given week?


Thursday, July 19, 2012

Organizing Baking Supplies - Creating Storage with the Strangest Things

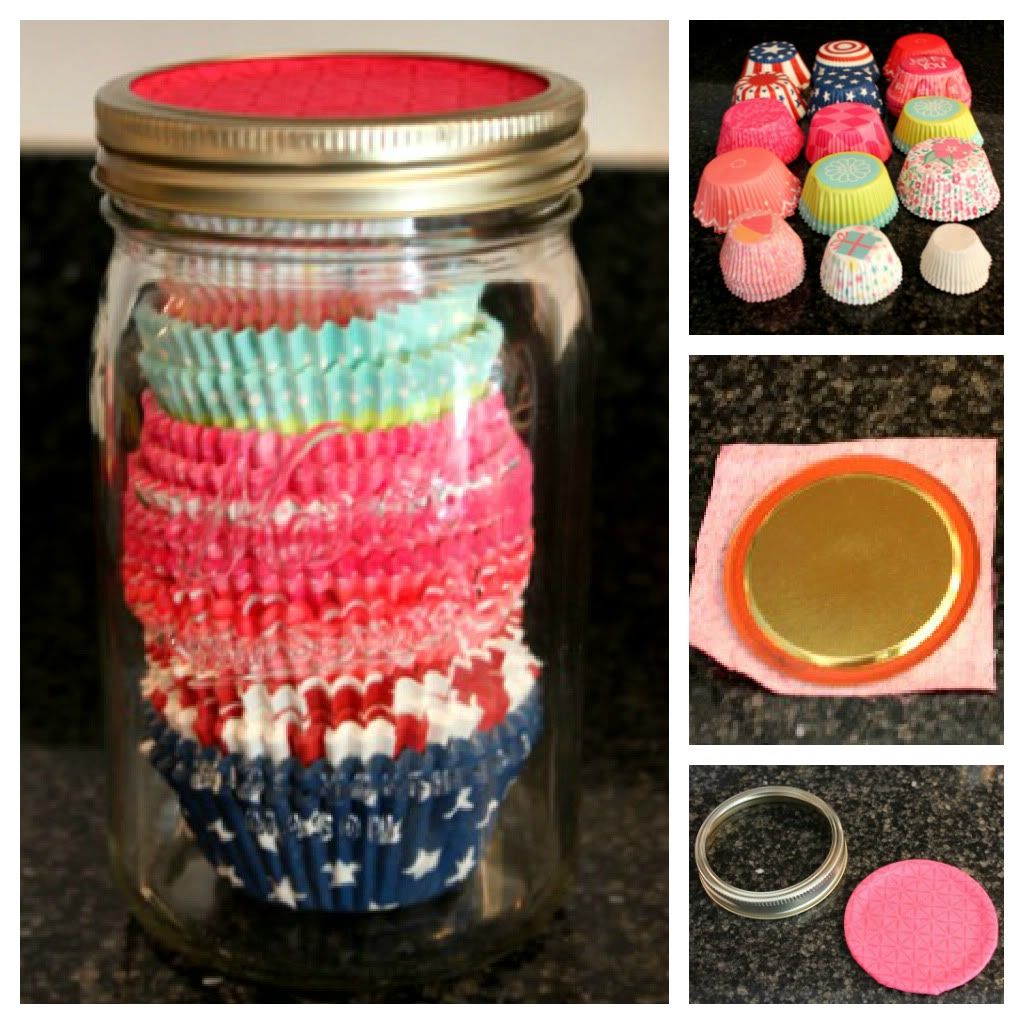
I love when I can find 5 to10 minutes in a day to reorganize a cabinet or create a new organizing system.  On Monday I found a few minutes to grab all the loose cupcake tins in my pantry and store them in a cute Ball jar with a covered fabric lid (read about that here).  Yesterday I was able to reorganize my baking supplies.  It took about 10 minutes and my daughter got into the action, too!  As I unloaded the contents of the shelf, she put them on the counter.  After a quick wipe with a hot, soapy rag, the cupboard was ready to be refilled.


I had a lot of loose cupcake/cookie decorations that were constantly falling over and taking up too much space!  I thought about picking up a storage container to stash them in, but remembered I was holding onto this plastic bag that contained a baking set my daughter had received for Christmas.  (I didn't want to throw it out - I just felt it would be wasteful).  I decided to store all the loose cupcake/cookie decorations in the bag and it worked out perfectly!  They fit in nicely and I was able to stand it up in the cupboard.  I can not tell you how much room it freed up!


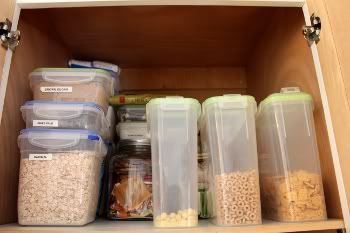
One of the tough things about my kitchen pantry is the shelves are super deep.  Since I don't use the baking supplies on a daily basis, I put them on the top shelf in the back.  I put all of our breakfast goodies (oatmeal supplies, tea, and cereal) in the front of the cabinet for quick access.


And that was it.  All done.  It only took a few minutes to straighten the shelf up and best of all - I came up with a quick, FREE way to organize my cupcake/cookie decorations.


What have you organized lately?  Have you found a way to repurpose something?


PS  You can find this over at the Delightful Order Inspiring Thursday Link Party!

Monday, July 16, 2012

Organizing Cupcake Tin Liners

A few months ago I struggled with finding organization in my kitchen pantry (you can read about that here).  I've since brainstormed a few ideas on how to re-organize my baking supplies and hopefully create more space on the top shelf of my pantry.

I found a little inspiration this week and decided to tackle storing my cupcake supplies - mainly the liners and decorations.  I was able to whip out a handy storage container for the liners in between making dinner and baking cookies with my daughter.  Sure I neglected the dishes in the process, but you can't beat time spent with the little one while multi-tasking and completing a small organization project!


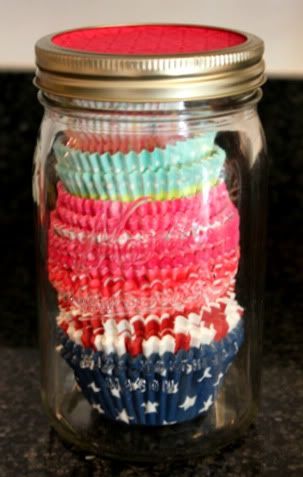
First I organized the liners by color/theme.  I then stacked them in a clear Ball canning jar that I already had.  I cut a small piece of remnant fabric that I had left over from a different project (a doll house we built - more on that in the coming weeks) and secured it to the lid with spray adhesive.  After it dried, I put the lid back on and voilà - a cute little storage container for all those liners that were floating around in the pantry.


Next up, organizing all those pesky cupcake decorations.  What small organization projects have you recently tackled?  I would love to hear about them!


Tuesday, June 12, 2012

Master Bedroom - Yea Progress!

We have taken a break from the basement project we started (you can read about that here).  The four boxes we still need to go through remain where we left them.  A few things have come up, and to say we have been a little sidetracked is an understatement!  (Do not fear - those four boxes are on our list to tackle this week!).

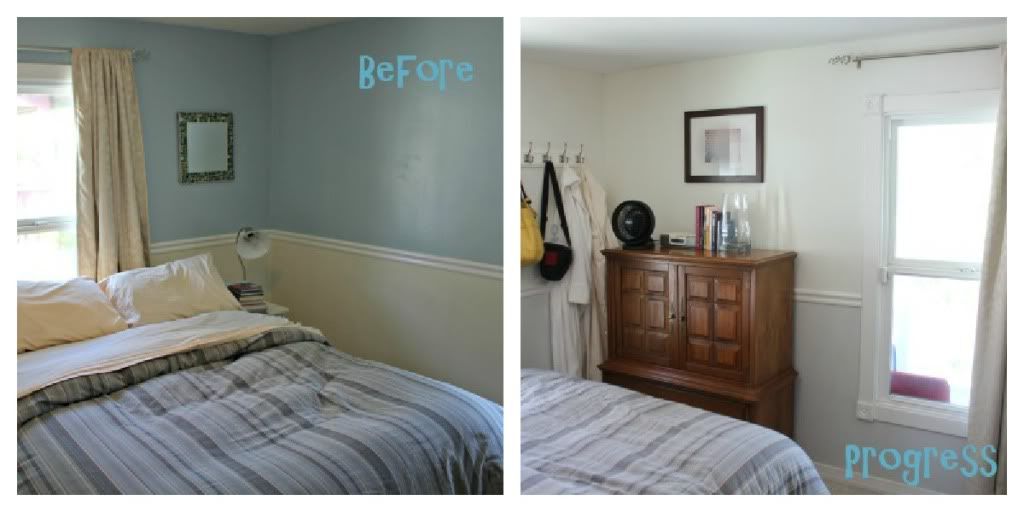
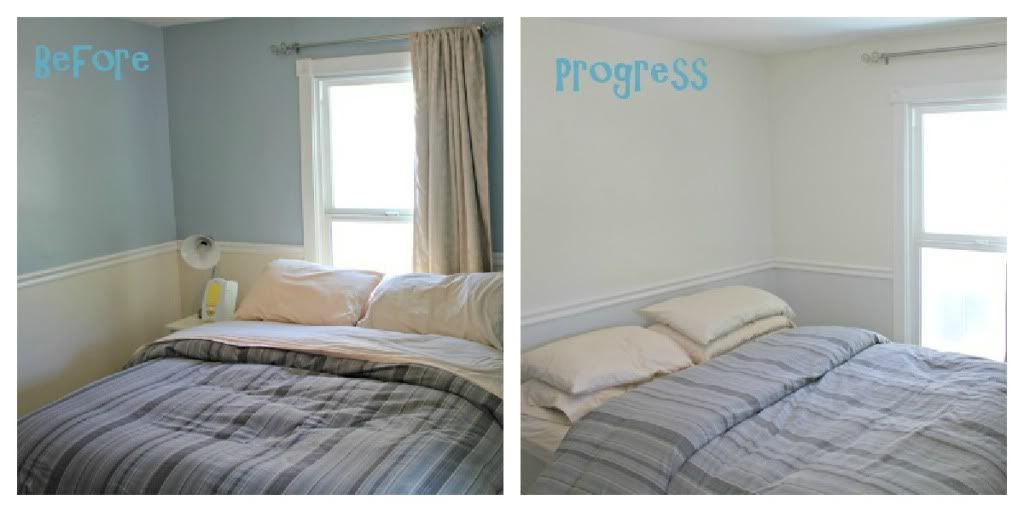
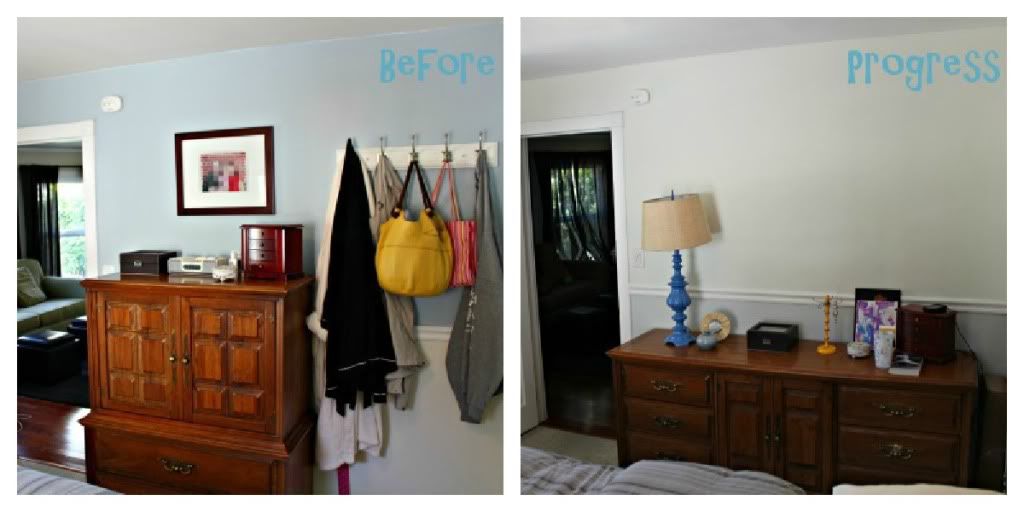
Instead, I painted the master bedroom (and potty trained a two-year old).  I know!  Why start a huge project(s) when you haven't finished the last huge project?  Well - this past weekend we had an opportunity to visit my parents and pick up the matching dresser to our (borrowed) bedroom set.  (I say borrowed because this is a temporary solution to our lack of bedroom furniture and storage.  My brother will eventually use this furniture in his house.)  Before we picked up the dresser, I really wanted to repaint the walls. A few months ago my husband mentioned he hated the blue paint and would love to change the colors.  I thought it would make life so much easier to repaint before we brought the new dresser home.  And there begins a new major project.

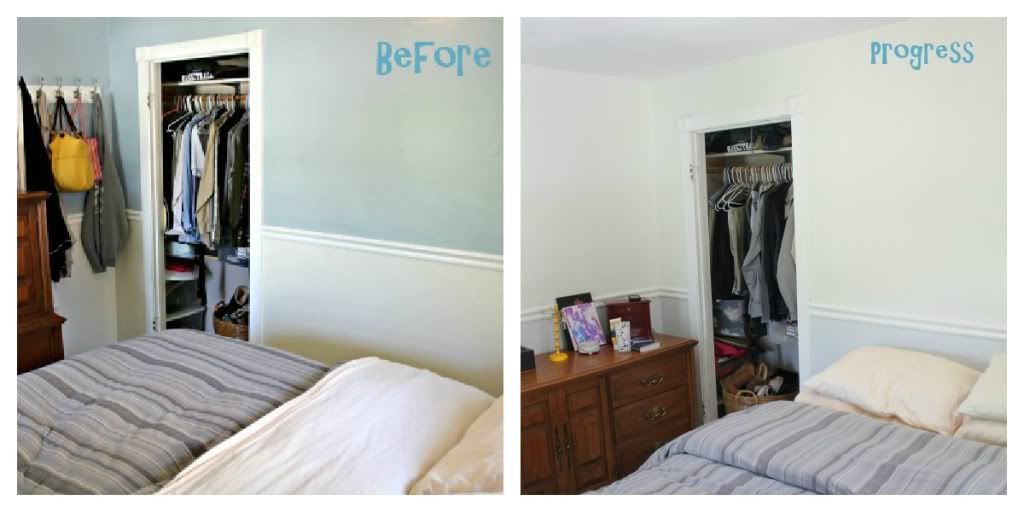
Here are a few before and after pictures (please forgive the horrible photography - I am taking classes to get better!)

View from the door.  We moved the taller dresser and changed the direction of the bed.

Imagine a DIY headboard in a khaki color (maybe) with a DIY circular drift wood mirror above the headboard.  Just imagine!  Really...the vision is there.
View from the bed to the bedroom door.  Ignore the blue lamp.  It's a DIY project that is not yet completed.  I still need to rewire the lamp (which will straighten the shade).  Imagine a wall gallery with dark gray frames above the dresser.

The plan is to wall paper the inside of the closet (it's currently pink) and revamp the storage that is already there.  We are going to also add a curtain over the door when we redo the window curtains.
So progress...I love it so far!  The new colors are softer and more welcoming.  Moving the bed actually added space.  And I cannot tell you how nice it is to have nine (yes, nine!) extra drawers!

Here is what is left on our master bedroom list:

Master Bedroom Re-Do
Change the paint color.
Wallpaper the closet.
Add a tension rod and curtain over the closet.
Find a cute tie-back for the closet curtain and window curtains.
Change window curtains (dark blue or gray).
Move tall dresser.
Get the matching dresser from my parents.
Move coat hooks.  Create a “coat” space for us + guests.
DIY headboard for our bed.
Build two shoe boxes for under the bed.
Find a bed skirt (debating on the color).
Update bed sheets and duvet cover.
Rearrange pictures.
Decorative pillows for bed.
Make one of the pillows from bird fabric (have).
Jewelry stand/photos wall over dresser.
DIY drift wood mirror.


Have you ever started a project only to get sidetracked by another?  I would love to hear your story.


Wednesday, May 30, 2012

Basement Organization Part 1 - So Embarrased

Do you have a room where you "hide" all the things you don't have time to put away before guests arrive?  You know - a spare room or closet where you can toss a few things and close the door.  No one is the wiser.  We have a room like that.  It's called the basement.  Don't have a place for something?  Send it to the basement.  Goodwill items?  Send them to the basement.  Guests coming over in 10 minutes?  Send everything in plain sight to the basement!

Well, after almost seven years of sending things to the basement we decided maybe we should tidy up a bit.  Umm, that's an understatement.  When I almost slipped on hangers lying on the basement floor last week, I decided it was time.  Not time to "organize."  We've done that before.  Not time for a yard sale.  Done that, too.  No, it was time to clean it out!  Really.  EVERYTHING was coming out.

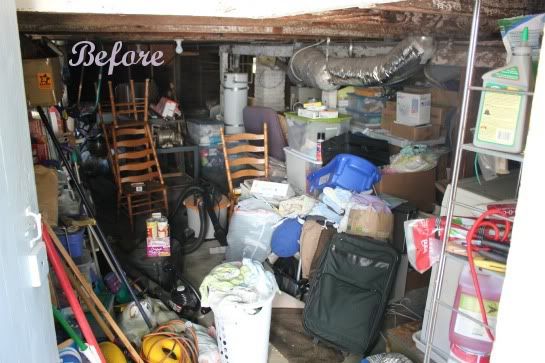
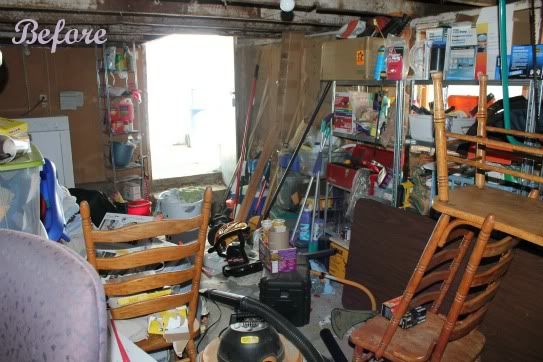
It looked like an episode from hoarders.  We are so embarrassed as we look back at the before pictures.

Looking in from the door.
Looking out.  Oh my!!
How did it get this way?  My husband and I talked about that.  A lot.  It really comes down to an ineffective organization system.  The things we use the most were on shelves in the back of the basement.  When we were done using things like suitcases or yard tools, we just dropped them inside the door.  We didn't have the time or energy to walk them to the back of the basement to put them away.

So we came up with a plan of attack.

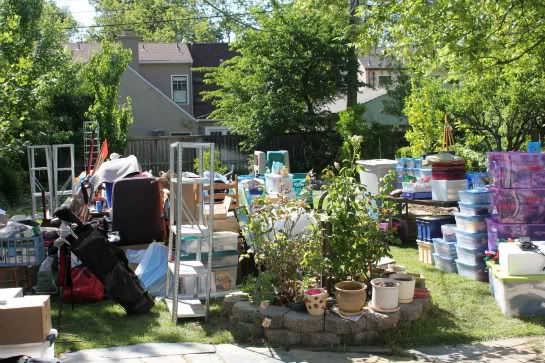
1.  We would take EVERYTHING out of the basement and put it on the back lawn.
2.  We would clean the basement (vacuum and dust).  It's an unfinished space so there wasn't a whole lot we could do in this department.
3.  We would put our heads together and draw a floor plan of how we would like things to be organized.
4.  We would start putting things away (this was going to be the biggest job!). We wanted to go through things and thin them out.  Keep what we wanted.  Send the rest to Goodwill or the trash.
5.  Once everything was put away, we wanted to go through everything one more time to see if we could thin it even more.  Why this step?  We knew that we would run out of time and that we would not be able to clean things out as thoroughly as we wanted.

A few other goals:  Nothing would be stored on the floor (all would be on a shelf) and we would store as much as possible in labeled storage bins.

Well, last weekend we tackled this HUGE project. Here is a picture of our lawn.  Oh my!  You should have seen the neighbors faces.  So embarrasing.


We made it through steps 1-3 (and partially 4).  We went to Goodwill twice and the dump once.  Over the next few weeks we plan on finishing step 4 (we still have four boxes to go) and we plan on tackling step 5.  I'll talk more steps 4 and 5 in my next basement post.  Plus, I plan to show after pictures and discuss our new organization system!  Stay tuned.  We will redeem ourselves!


Tuesday, May 29, 2012

Barrette Board - Pinterest Inspiration

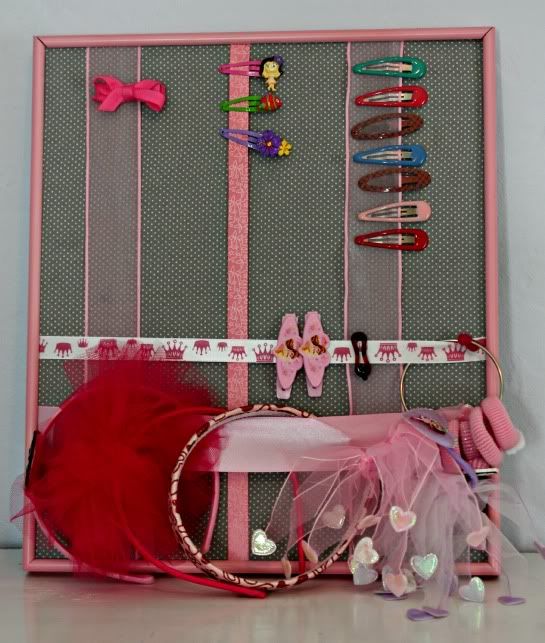
I saw this cute storage idea for organizing little girl barrettes on Pinterest (see the original at Attempting Aloha) .  I thought it would be perfect for my daughter.


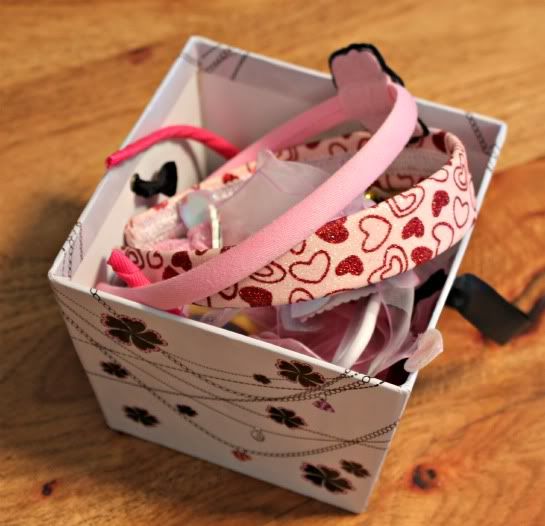
We currently are storing all of my daughter's hair ties and barrettes in this little box. The only problem was that when my daughter wanted to see (ie play with) her barrettes, she would take them out and lay them on the floor. Her curious little brother would then help himself. Eight month olds and barrettes don't go so well together.


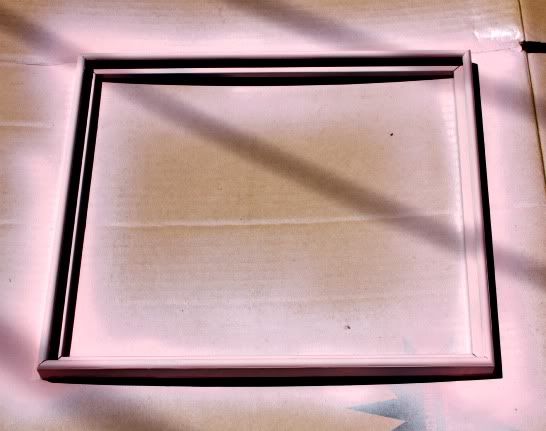
I thought making this barrette board would be a perfect way for her to see all of her hair things, keep them up out of reach, and make a pretty display.  I already had on hand all of the materials (minus the spray paint - $4.99 at our local hardware store).  The picture frame was metal and took about 3 coats of pain to cover.


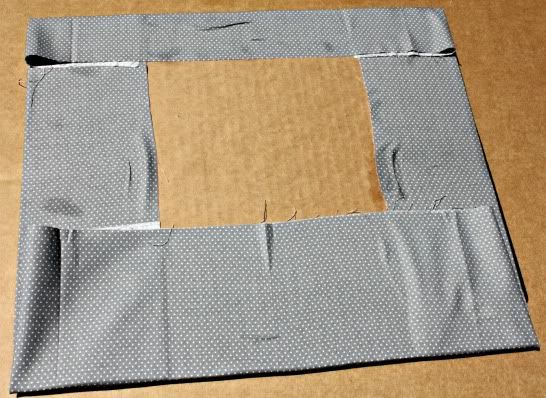
I used spray adhesive to attach a piece of remnant fabric to the original cardboard backing that came with the frame.  I didn't worry too much about how the back looked because I knew I would cover it with a second piece of cardboard when I slid the fabric covered board back into the frame.


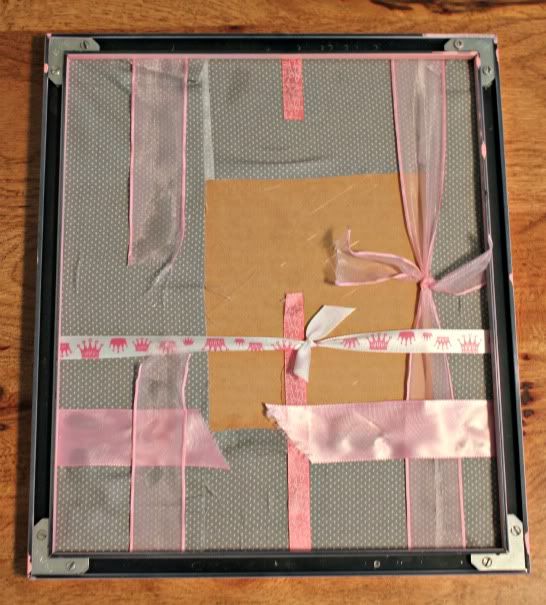
Using scrapbook ribbon I already had, I tied them into place.  Those ribbons that were too short received an extra dose of hot glue to hold them in place.  Then I slid the original cardboard back into the frame.  To cover the unsightly back, I cut a clean piece of cardboard out of an old box and slid it in the frame to close the back off from view.


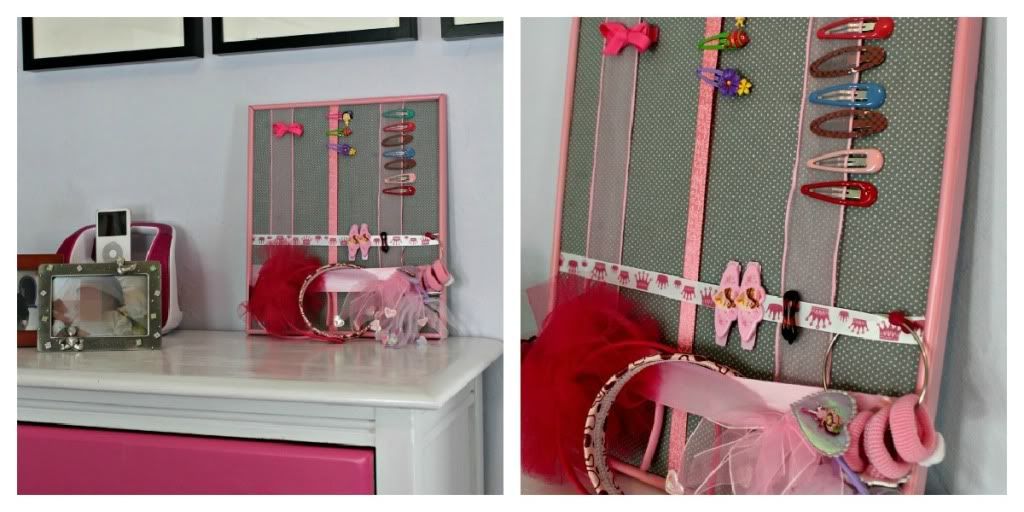
Then my daughter and I added all of her cute barrettes, rubber bands, and head bands to the board.


I absolutely LOVE the final product.  It is cute and organized.  A huge improvement!

What has Pinterest inspired you to do lately?  I would love to hear and see what you have been working on!

PS  I am so proud of this project!  I have linked up at Organize & Decorate Everything (my first time doing this!!).  So fun!

Thursday, May 24, 2012

DIY Fabric Storage Boxes - Pinterest Inspiration

My sweet husband installed new shelves in the nursery a few months ago.  The idea was to create vertical storage in the room.  We wanted to free up floor space so the kids would have more room to play and create a place to store toys, clothes, and office equipment.  The shelves turned out great, but as we used them I realized we needed more storage containers to hold toys.  I considered buying baskets (I had already purchased four for my son's clothes) but they are so expensive!  Then I saw DIY fabric storage boxes on Pinterest.  They looked easy enough.  The inspiration and tutorials I used were from IHeartOrganizing and PostivelySplendid.

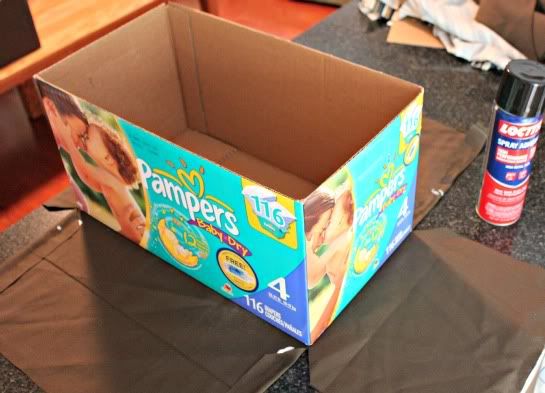
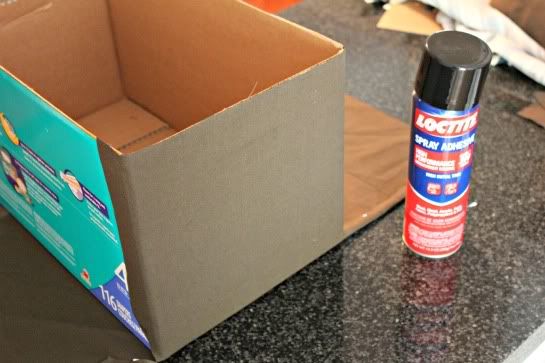
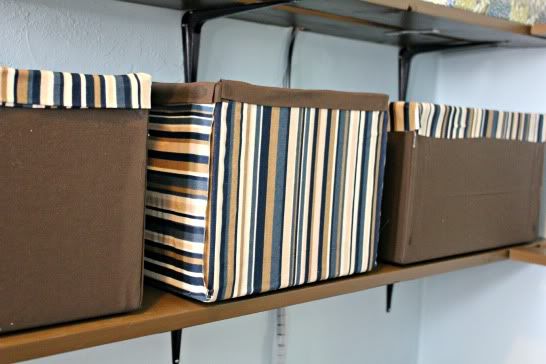
Using the tutorial on PostivelySplendid I was able to VERY EASILY cover the outside of three diaper boxes with fabric.

The inside proved to be more difficult.  I did not want to sew liners so I used the tutorial on IHeartOrganizing to line the inside of the boxes.  Unrolling the fabric as you slowly spray the glue section by section was the secret to getting the fabric to lay flat.  (Sorry - I didn't take any pictures.  I was up to my elbows in glue!)

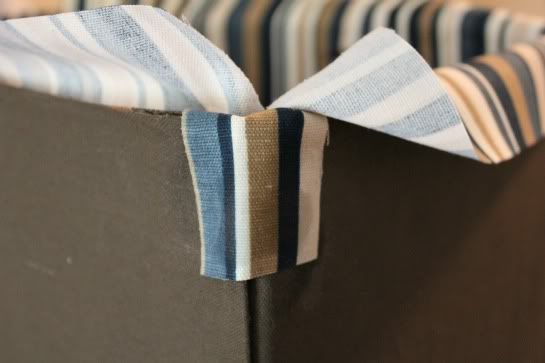
To create the corner, I used a small piece of scrap material.
Creating the corner.
The biggest problem I ran into when making these storage boxes was getting an even edge around the outside of the box.  I wanted the inside material to make a 1 inch border around the outside.  I had a really difficult time getting the border even. 

Oh, yucky uneven edges.  What to do?  What to do?
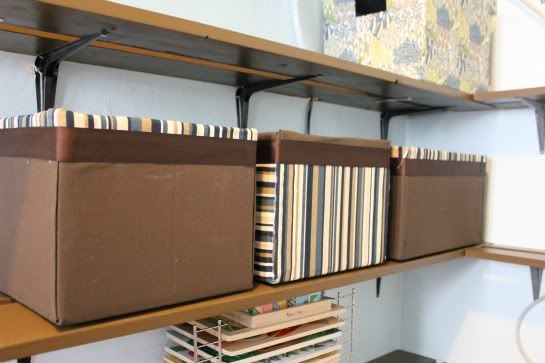
I ended up hot gluing a ribbon around the outside of the box where the two different fabrics met.  I wasn't sure if it was going to work, so I selected a neutral color ribbon.  A brighter color would work great, too.  The ribbon really evened out the "hem" and cleaned up the box.
Ribbon did the trick!  Goodbye uneven edges!

Overall, I am happy with the final product.  The boxes were more difficult to make than I thought they would be (mainly because I couldn't handle an uneven edge), but I am happy now that they are completed.  They work great and hide toys very well!
What DIY storage project have you been working on lately?  I would love to hear about it!

Wednesday, May 23, 2012

Toy Organization: Puzzles

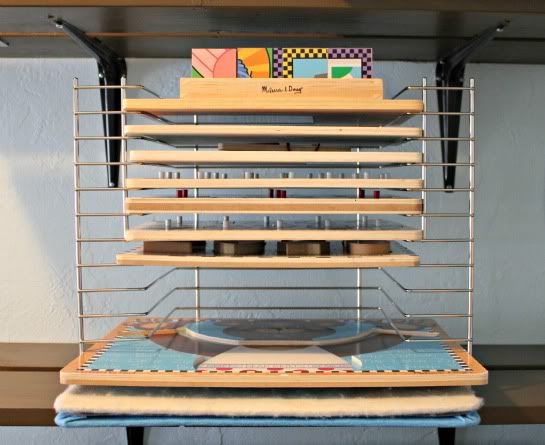
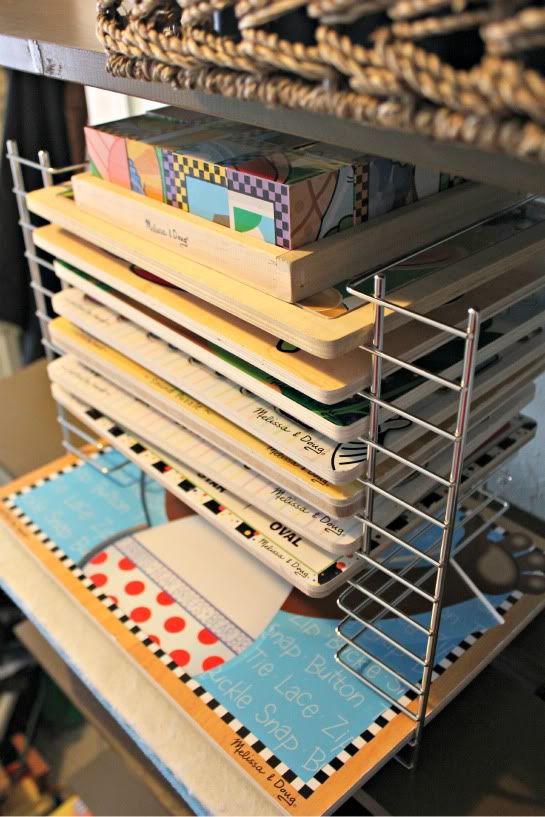
I broke down and bought an organizer for my daughter's puzzles.  When I saw it, I knew it would be the perfect way to store her ever growing puzzle collection.  We had been storing them in a basket in the family room.  This system worked fine except you couldn't see the puzzles. Plus, the pieces often got tossed into the basket creating a huge, unorganized mess.  I loved this particular Melissa & Doug organizer, because it held different sized puzzles.  It is pretty amazing!  Hello puzzle organization.  Oh how I love you!

 
How do you organize your kids' puzzles?  Do you have the perfect organization method?

Monday, April 23, 2012

Why My Pantry Will NEVER Look Like A Pantry on Pinterest


I have a love-hate relationship with Pinterest.  I love that it inspires me to be creative and tackle new projects.  I hate that it gives me this “stressed out, I have to do everything I see on Pinterest” feeling.  I guess you can chalk it up to my type-A personality!

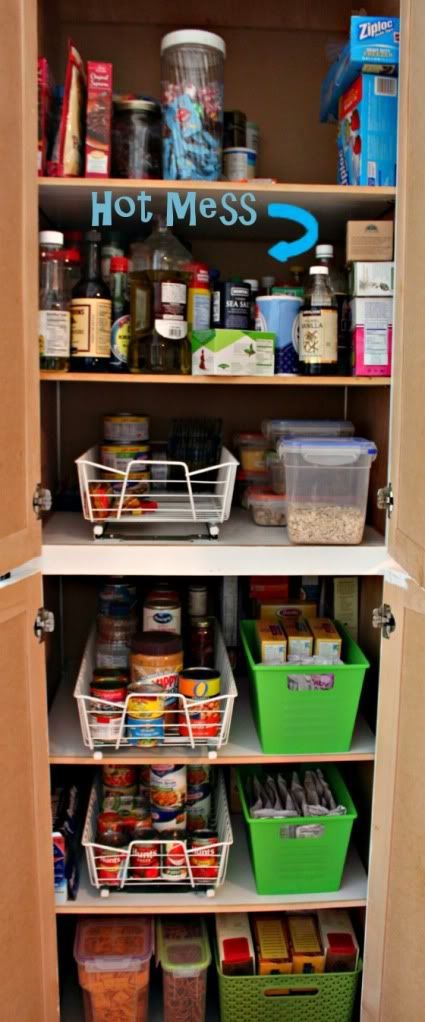
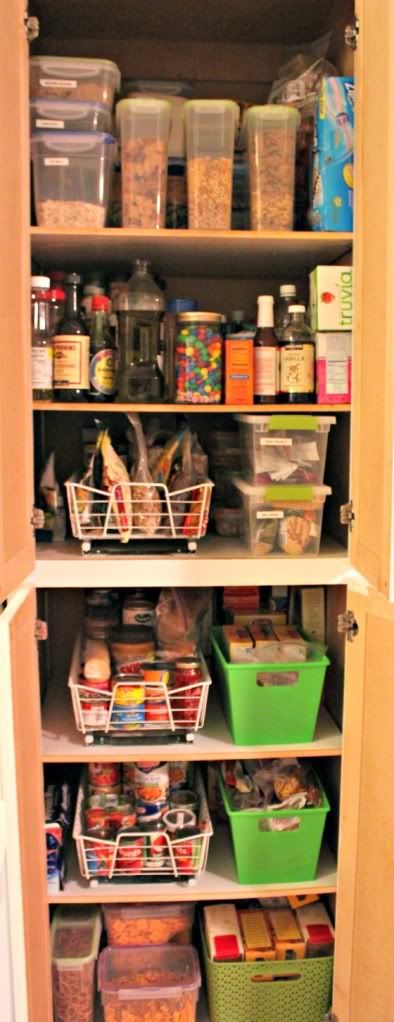
I wasn’t loving Pinterest so much on Saturday. We did our monthly grocery shopping and when I was putting the groceries away I decided to reorganize the pantry.  In my mind, all I could visualize were these super organized pantries you see on Pinterest.  As hard as I tried, I was finding myself getting frustrated that I couldn’t make my pantry look like those I have pinned.  You know what I’m talking about – the beautifully organized, over-labeled pantries that people post with comments like “I wish my pantry looked like this” or “so inspiring.”  As I was standing in my kitchen looking at this mess (see the picture below) and wondering how in the heck I was going to get it into the pantry, I realized that I was driving myself insane.  And that’s when I realized that my pantry will never look like those you see on Pinterest. 

This had to somehow find its organized way into my pantry.
Here are five reasons why my pantry will never be a Pinterest pantry:
  1. I actually own food.  Silly huh?  But really, the pantries I see on Pinterest do not have a whole lot of food in them.  They also lack in a variety of foods.
  2. I have two kids.  They like to eat and my daughter has taken to complaining when I don’t have the cabinet stocked with her favorite snacks.
  3. I have a husband and he doesn’t always put things back in the “right” place.
  4. I have only one place to store food.  What you see is what you get.  The pantry is the only place I have to store non-perishable food.  And that means I have to get a lot in a little space!
  5. My pantry is deep.  I unfortunately have to stuff things in the back.  Even with the simple white roller baskets I installed when I was in my "pregnant nesting phase" with my daughter, things still get hidden in the back of the cabinet.  I have not figured out a way around this (yet!).
It's a work in progress.
Even though it doesn’t look like it, I am actually organized.  Everything has a place and I reorganize and reevaluate the space every time I go grocery shopping.  There is a shelf that is a constant work in progress (my oils/spices - see "hot mess" above) and I may have a solution, but that’s for another day (when my husband can watch the kids so I can tackle and finish it at the same time). Until then, my pantry is what it is and I think it looks pretty good.

After everything was put back in the pantry.
Do you have an organization project that is challenging or constantly evolving?  I would love to hear about it!


Friday, April 20, 2012

Our New Kitchen “Office”


When our second child was born, we converted our home office into a nursery. Mostly nursery with some office - we honestly have nowhere else in the house to store office supplies.  My husband built some awesome vertical storage on a wall in the nursery for us to store a few minimal office supplies and equipment (plus toys).  The space was working okay but not great.  Whenever our son was asleep, we could not access any office supplies for fear of waking him up.  The problem is our house is so small, we really have no place for a traditional office!

Then, a few weeks ago, I stumbled upon a great home organizing blog called IHeart Organizing.  They were highlighting a reader space where the reader created a home “office” in a kitchen cabinet.  I was completely inspired.  We had a cabinet that I was currently using to store cookbooks, a few pens, and miscellaneous kitchen items.  It was a space that could definitely be used more efficiently.   I couldn’t cram a printer into it, but I could store our highly used office supplies there. 

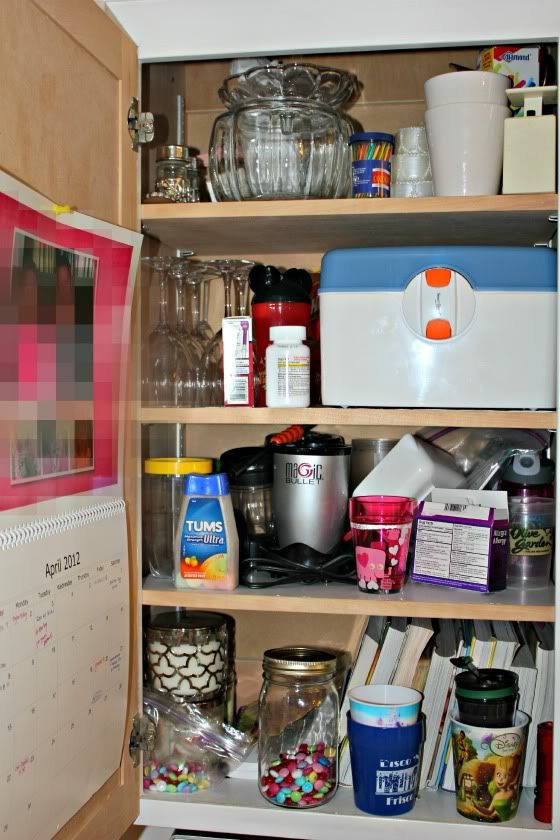
Here is the kitchen cabinet before (yea...it was a mess).


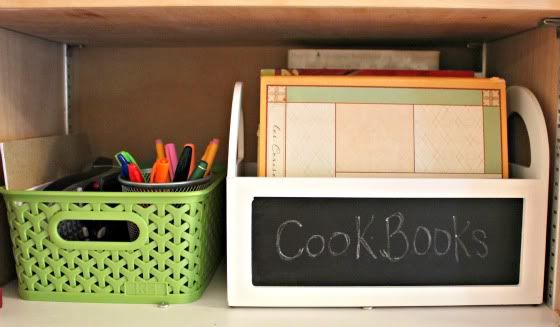
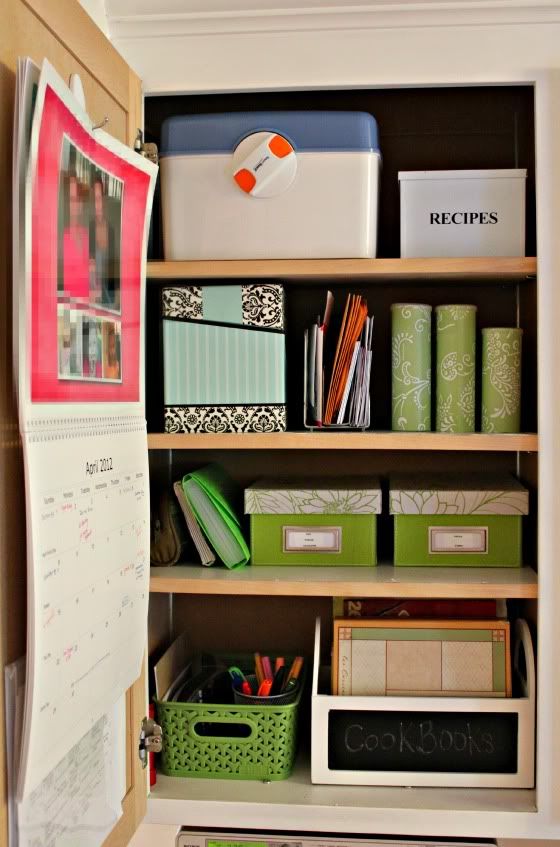
I paired down our cookbooks to a few of my favorites and stored them in this cute chalkboard storage box I found on clearance at Target.  Pens and paper are easily accessible next to the cookbooks.

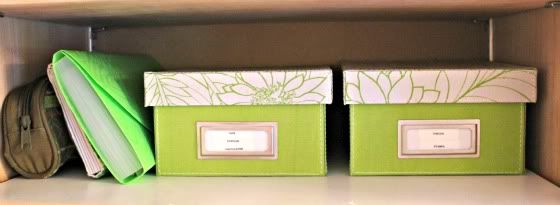
I put checkbooks, staplers, tape, a few miscellaneous items into these storage boxes that I also found on clearance at Target.  Coupons are stored on this shelf as well.

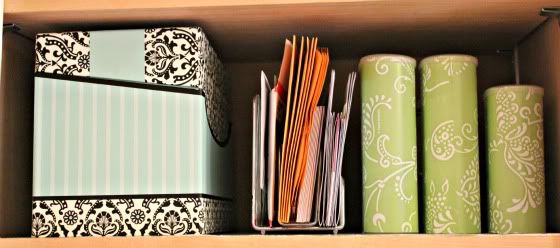
Envelopes, stamps, and bills are filed in a metal rack that I already had.  These are stored alongside a box of cards that I use for birthdays and other occasions.  I used old re-purposed Crystal Lite containers to store chargers that we use on a regular basis.

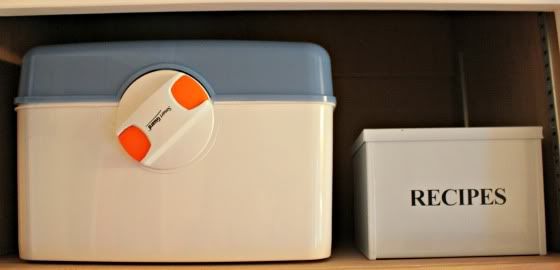
Our medicine is stored on the top shelf in our medicine safe along with new recipes that I would like to try but haven’t gotten around to yet.


As I have used the new {and can I say amazing} space, I realized that I did need to label the storage boxes.  I also covered and labeled the Crystal Lite containers and added a few more items (umm…like my label maker and a few awesome Martha Stewart products!).  When all was said and done, I spent about $20 on our new “office.”

Here is the completed space!  I absolutely adore it.  It is clean, neat, and practical. 

Has something on the internet recently inspired you to reorganize a space in your home?  I would love to hear your story.


Related Posts Plugin for WordPress, Blogger...