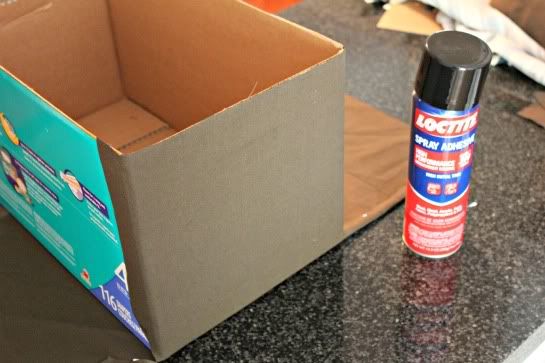
My sweet husband installed new shelves in the nursery a few months ago. The idea was to create vertical storage in the room. We wanted to free up floor space so the kids would have more room to play and create a place to store toys, clothes, and office equipment. The shelves turned out great, but as we used them I realized we needed more storage containers to hold toys. I considered buying baskets (I had already purchased four for my son's clothes) but they are so expensive! Then I saw DIY fabric storage boxes on Pinterest. They looked easy enough. The inspiration and tutorials I used were from
IHeartOrganizing and
PostivelySplendid.
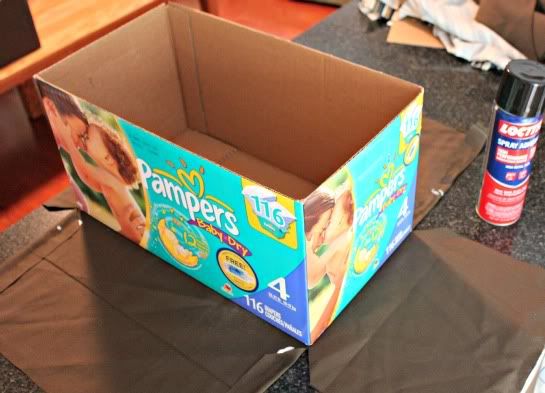
Using the tutorial on PostivelySplendid I was able to VERY EASILY cover the outside of three diaper boxes with fabric.
The inside proved to be more difficult. I did not want to sew liners so I used the tutorial on IHeartOrganizing to line the inside of the boxes. Unrolling the fabric as you slowly spray the glue section by section was the secret to getting the fabric to lay flat. (Sorry - I didn't take any pictures. I was up to my elbows in glue!)
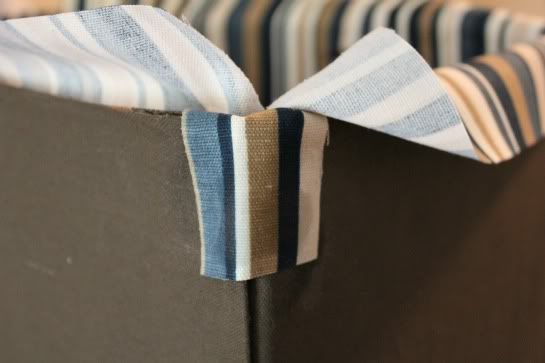
To create the corner, I used a small piece of scrap material.
 |
| Creating the corner. |
The biggest problem I ran into when making these storage boxes was getting an even edge around the outside of the box. I wanted the inside material to make a 1 inch border around the outside. I had a really difficult time getting the border even.
 |
| Oh, yucky uneven edges. What to do? What to do? |
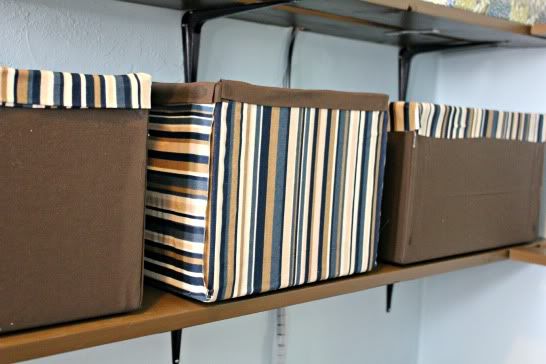
I ended up hot gluing a ribbon around the outside of the box where the two different fabrics met. I wasn't sure if it was going to work, so I selected a neutral color ribbon. A brighter color would work great, too. The ribbon really evened out the "hem" and cleaned up the box.
 |
| Ribbon did the trick! Goodbye uneven edges! |
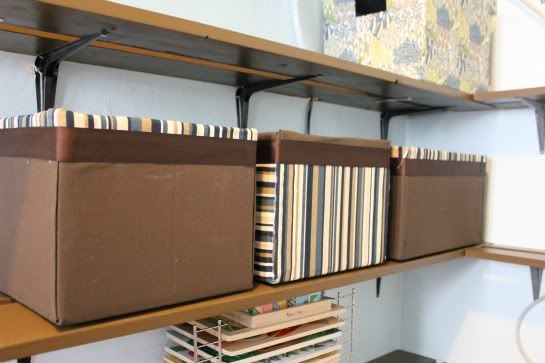
Overall, I am happy with the final product. The boxes were more difficult to make than I thought they would be (mainly because I couldn't handle an uneven edge), but I am happy now that they are completed. They work great and hide toys very well!
What DIY storage project have you been working on lately? I would love to hear about it!